Note: Zenhub's full feature set is unlocked when you connect your GitHub Organization to Zenhub.
Connecting Slack and Zenhub helps you and your team stay updated on important project changes related to Zenhub. You can further pair it with GitHub's integrations for an even more comprehensive picture of your team's project activity.
With the Slack integration, you will be updated when:
- An Issue changes from one pipeline to another (From “In Progress” to “Review”, for example)
- An Estimate is set, updated, or cleared
- An Issue is moved up or down in a pipeline (reprioritized)
Cloud Customers: Please note that Slack Integration requires a connection to GitHub to be setup for your Zenhub account.
To configure an integration, visit your Account Management and select the 'Slack & integrations tab'. Here, you can configure Zenhub to post important GitHub Issue updates to Slack by clicking on 'Create New Integration'.

To get started, navigate to your Zenhub Dashboard and select the 'Slack & integrations' tab—This is where you will be able to configure integrations for Slack and other custom integrations you might want to try out.
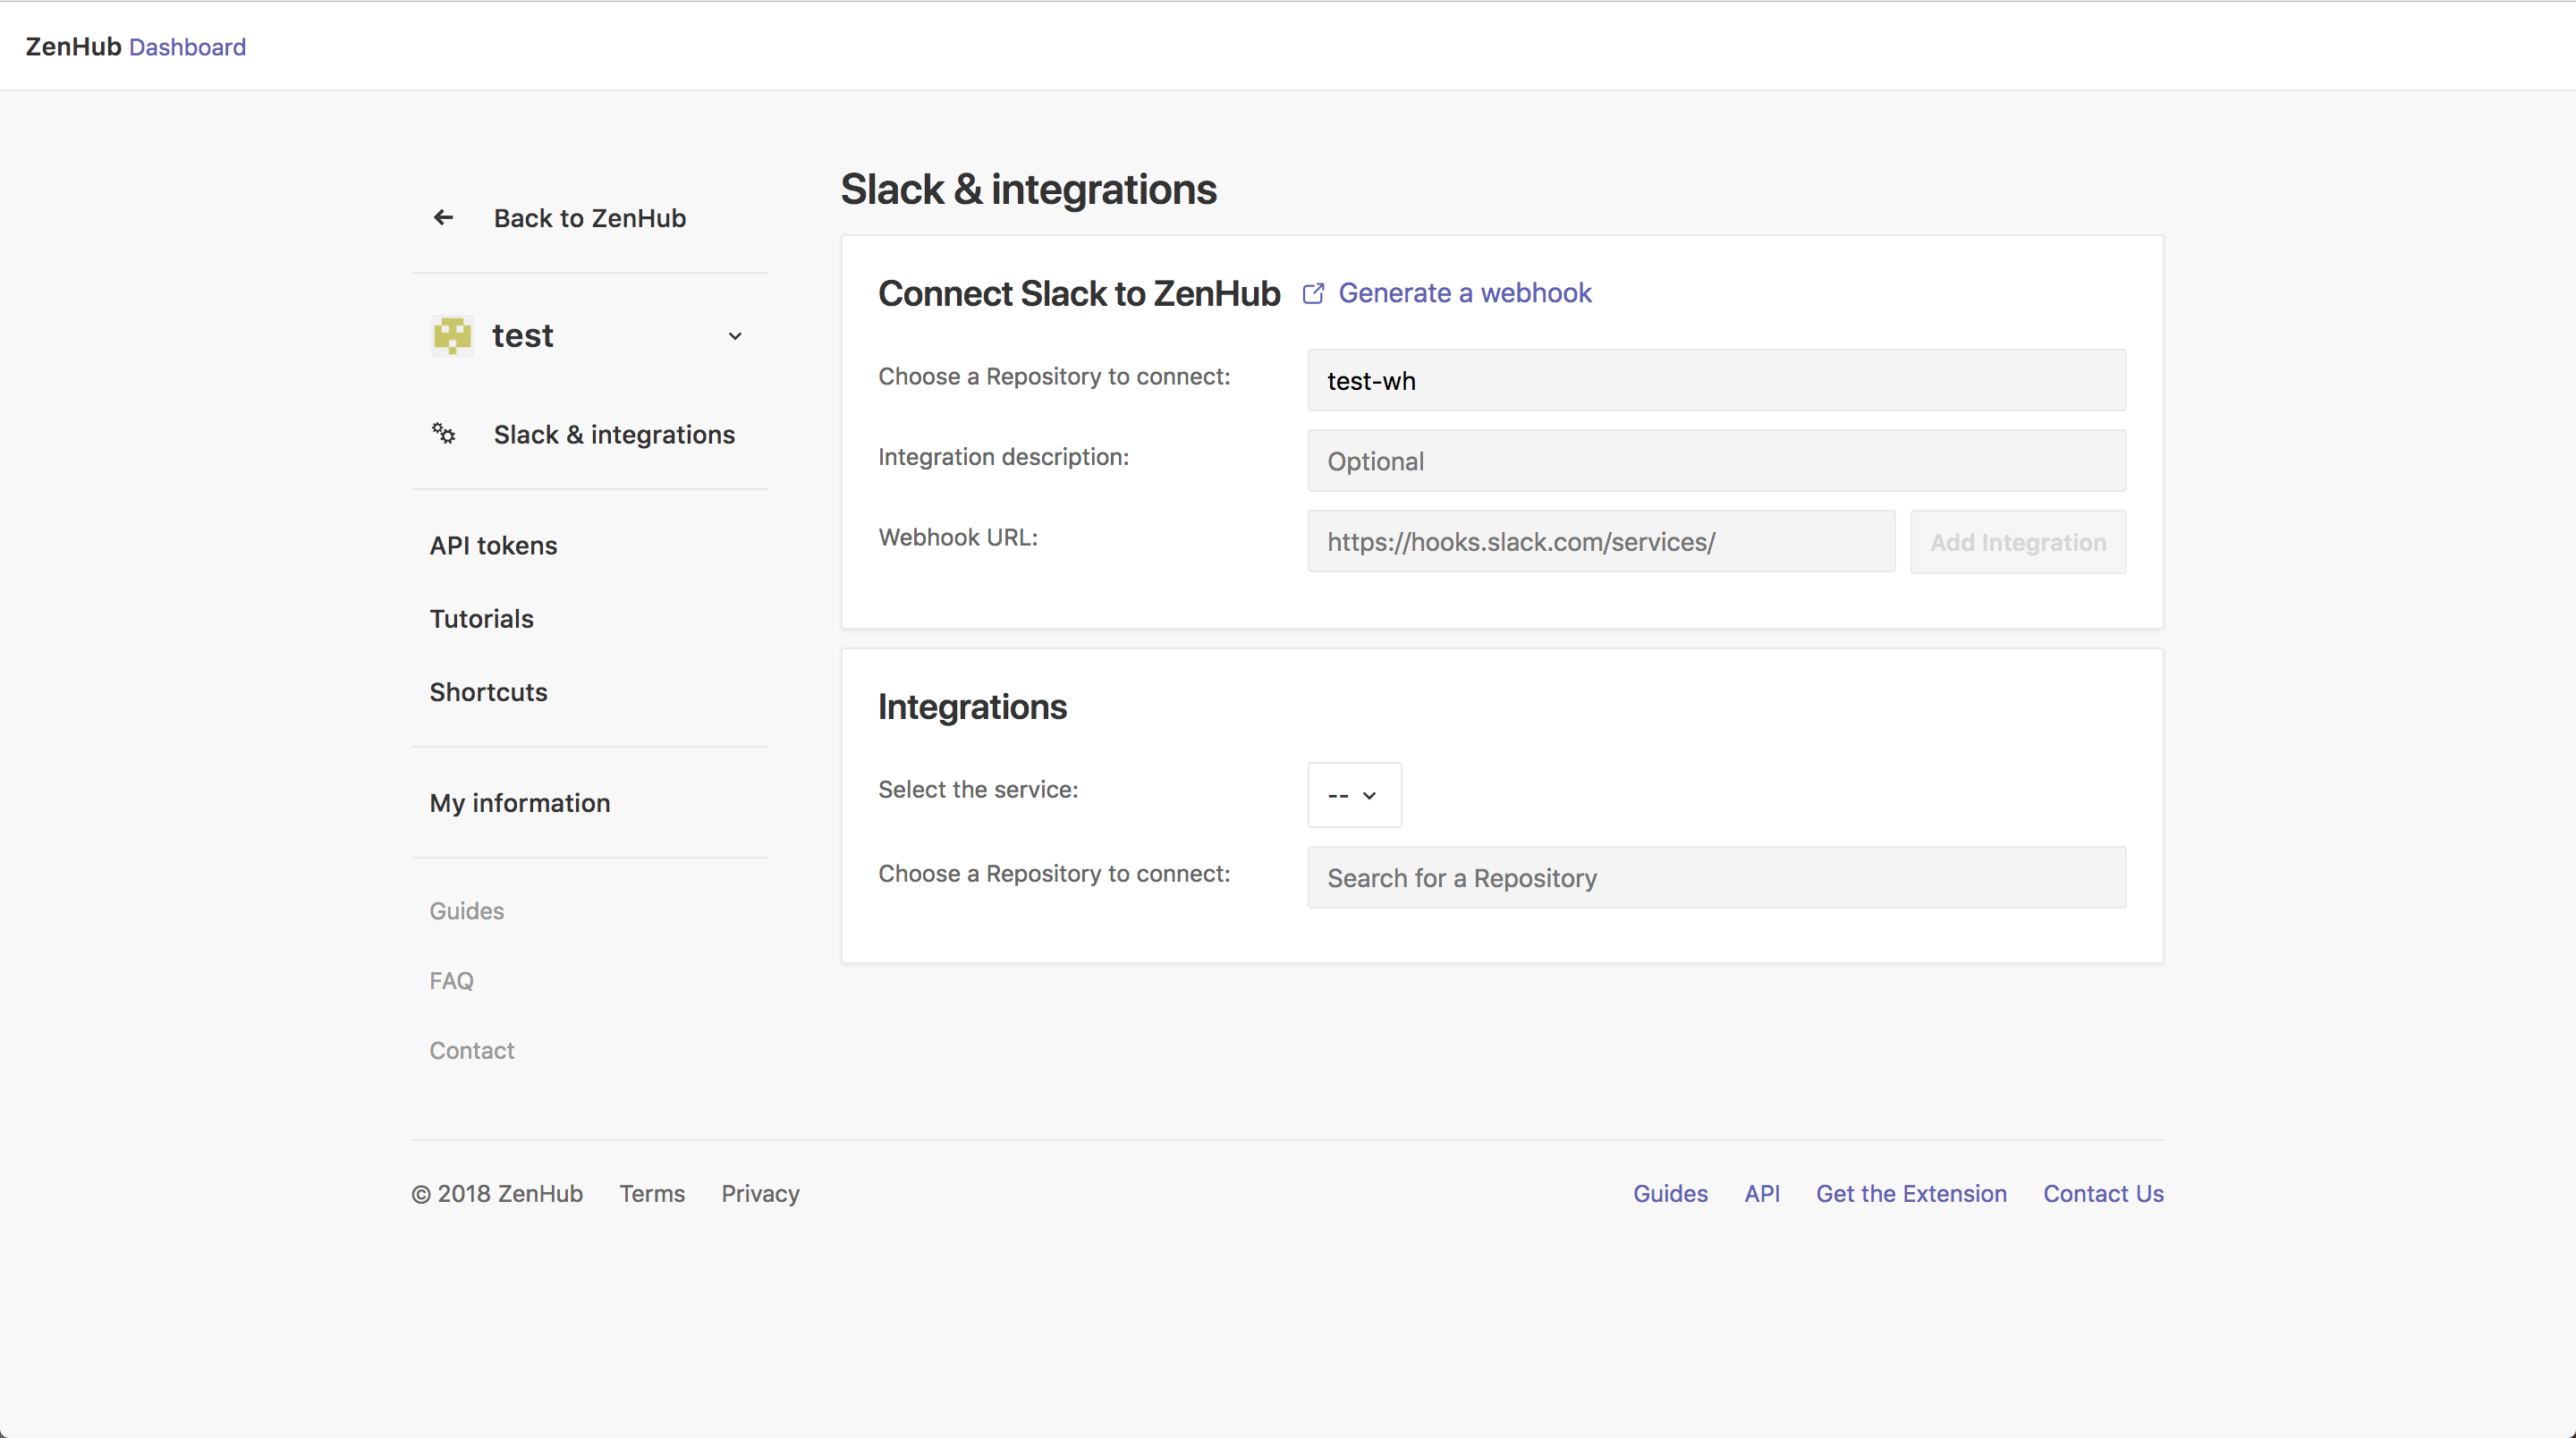
In the 'Connect Slack to Zenhub' section, you will see a dropdown to select the repository you would like to connect to Slack, as well as fields to enter a description for the integration and the webhook URL. To get the right Slack URL you need to head to the Slack Integration Settings page for your team.
How to obtain your Slack Webhook URL
Important note! This step requires you have the appropriate Slack permissions to add an incoming integration. If you do not, ask your Slack administrator to complete this step for you.
To get started, head to the Apps and integrations tab within your Slack settings. Next, search for webhooks in the App directory. Select Incoming Webhooks

On the Incoming Webhooks configuration page, select Add Configuration on the left-hand side to get started creating the custom URL.

On the configuration page, you’ll be prompted to select the channel you’d like to push Zenhub notifications to. If the desired channel doesn’t yet exist you can create it directly from this interface. You’ll have to refresh the page for it to appear in the dropdown channel options.
Once you’ve selected the desired channel, confirm your choice by adding the integration. Once confirmed, a Webhook URL will appear. Copy the entire URL and paste it back into the Zenhub Dashboard.

Slack for Zenhub Enterprise follows a setup process that can be used only in Chrome. Once set up, Zenhub can be used across the web app, or via the extension in Firefox in addition to Chrome.
Open your console
To open the developer console first right-click, inspect element, head to the second tab: the console tab.
Select the Zenhub Enterprise Extension option from the top of the console
Once the console is open, head to the repository you’d like to have push notifications from ZenHub to Slack. In the console tab, you have to select the Zenhub for GitHub Enterprise extension from the dropdown where the browser says top.

Copy the code script from the Slack setup page
Head back to the setup page where you first downloaded the extension, but head to the how-to page for Slack and copy the entire script.

Once the script is copied, paste it into the console area on the tab you have open for the repository you’d like to connect to Slack.
Important note! Do not hit enter once the script is pasted, there are variables that need to be changed.
Change the variables at the top of the script
Now that the script is pasted into the console, it’s time to change the top variables to match what information you’d like to send, and what Slack channel you’d like to send it to.
First, Change the URL to match the unique GitHub Enterprise instance for your team. The first variable needs to be updated to match the unique URL for your team’s GitHub Enterprise instance.

The best way to find this URL is to navigate to open up the same repository in a new tab, open the console, and navigate to the network tab. Once on this tab, look out for an action called pipeline-estimates that will appear in the list.
Click on this event in the list. Once clicked, there will be a second window pop-up on the right side of the list where you can navigate to secondary tabs. Head to the Headers tab. On the top of this tab will be a General section with a Request URL noted.
Copy the first part of this URL and paste it into the script that you’ve pasted in the original tab in the URL section.

Second, update the Organization and Repository variables. Change the OrgName variable to the same organization the repository currently sits within. The best place to look for this is at the top of the page, next to the repository name and the icon indicating whether this is a private or public organization.

Third, update the Webhook Title. The title can be named anything you’d like! Best practice is to name the webhook integration title relevant to the integration you’re setting up. In the example below, we’re setting up the Slack and Zenhub integration. You might want to add the repo name or slack channel you’re sending this to for reference later on.

Fourth, update the Webhook URL. To get the right Slack URL you need to head to the Slack Integration Settings page for your team.
Important note! This step requires you have the appropriate Slack permissions to add an incoming integration. If you do not, ask your Slack administrator to complete this step for you.
To get started, head to the Apps and integrations tab within your Slack settings. Next, search for webhooks in the App directory. Select Incoming Webhooks
On the Incoming Webhooks configuration page, select Add Configuration on the left-hand side to get started creating the custom URL.
In the configuration page, you’ll be prompted to select the channel you’d like to push Zenhub notifications to. If the desired channel doesn’t yet exist you can create it directly from this interface. You’ll have to refresh the page for it to appear in the dropdown channel options.
Once you’ve selected the desired channel, confirm your choice by adding the integration. Once confirmed, a Webhook URL will appear. Copy the entire URL and paste it back into the script.

Confirm you’ve updated all Variables and enter
Now that you have all variables updated, you can hit enter at the end of the script in the console. Hitting Enter should generate the incoming notifications in your desired Slack channel. Make a change within your Zenhub Board, such as moving an issue between pipelines or reprioritizing an issue within a pipeline. This will send a notification to Slack!
